Register with us for competitions, online recipe book and chat


Sew a wipe-clean lunchbag: free sewing pattern
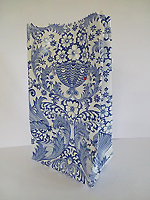
Keep packed lunches safe in this smart and practical lunchbag
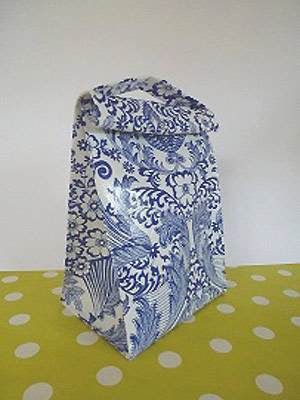
Put an end to plastic bags and keep packed lunches safe in a smart wipe-clean oilcloth lunch bag.
You will need
● A 40cm x 80cm piece of oilcloth (if you are buying off the roll you will need to ask for a 40cm piece. Oilcloth usually comes in widths of at least 140cm so this will give you extra fabric to make a spare.)
● Velcro - stick-on if possible
Cutting out
Cut two rectangles of oilcloth measuring 30cm x 36cm (this is the bag body).
Cut one rectangle measuring 17cm x 7cm (the handle).
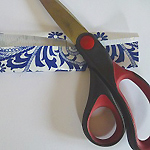
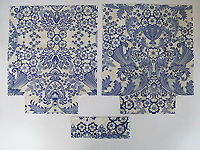 On each bottom corner of the two bag body pieces, draw a square measuring 6cm x 6cm. Cut out these squares (right). These will form the bottom of the bag.
Making the bag body
Place the two bag body pieces on top of each other, right sides together. Pin sides and bottom edge. Leave the top edge open. Straight stitch the three pinned edges with a 1cm seam allowance.
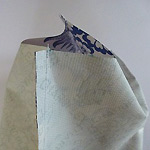 Forming the base
Turn the bag upside down so the base is uppermost. Pinch the edges of the cut out 6cm square corners together - matching side and base seams in the middle.
 Pin into place. Stitch, using a backward stitch at each edge to reinforce the corners.
Turn the bag the right way round.
 Topstitch the bag
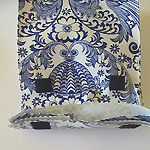
Using the bag base as a size guide – pin the edges of the bag into a neat boxy shape. Topstitch 0.25cm from the edge.
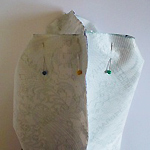
Attaching the Velcro
Cut two 1.5cm squares of Velcro.
 With the bag lying flat on the table, attach the Velcro 0.5cm from the top edge and 2cm in from the sides. Flip the bag over, and fold down the velcroed edge twice. Stick the matching Velcro into place so it stays neatly in its folds.
Making the handle
 Take the handle and fold in one long edge to the middle. On the other long edge, make a double fold so it lies over the raw edge of the other side. Stitch into place down the centre.
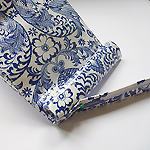 Take the lunch bag and with the bag closed (ie folded over), position the handle across the top folded edge of the bag so the handle sits right at the top of the bag. Pin to the back side of the bag only. (If you pin to the back and front, you won’t be able to get anything into the bag.) Stitch into place with a small zigzag. Do the same on the other side.
Trim off all the threads and try it out with your egg mayo sandwich.
You might also like...


Post your comment
Join us here...


Click on a magazine title to see all its
online features and news

Stain buster
Our guide to removing smudges, spots, and other spills.
See more stain busting solutions >
Community
Forums
View all forums
Blogs
View all blogs-
 The five best things I tried this month
Posted by 11280Adrienne Wyper
-
 Learning Italian - è fantastico!
Posted by 11320Carol Muskoron
MORE FROM ALLABOUTYOU
View by magazine :
Contact | About Us | Privacy | Complaints | Terms & Conditions | Cookie Policy | Advertising | Site Map| Popular Forum Threads
© Hearst Magazines UK is the trading name of The National Magazine Company Ltd, 72 Broadwick Street, London, W1F 9EP. Registered in England 112955. All rights reserved.
All About You, Part of the Hearst UK fashion and beauty network © Copyright 2024