Register with us for competitions, online recipe book and chat


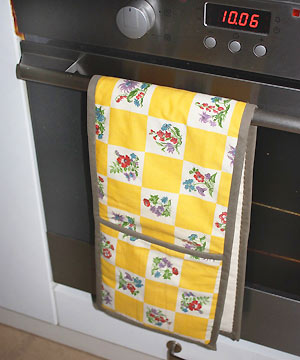
Sew smart oven gloves: free sewing pattern
Make cooking more fun with this practical but stylish oven glove. By Kirsten Edwards
You will need
● 50cm heavy cotton patterned fabric
● 50cm heavy cotton plain fabric
● 260cm (102in) 2.5cm (1in) wide bias binding in a contrasting colour
● 50cm cotton wadding
How to make
1 Cut a rectangle measuring 87cm (34in) by 20cm (8in) from each of the patterned and plain fabric.
2 Cut two squares measuring 20cm (8in) by 20cm (8in) from each of the patterned fabric and plain fabric.
3 From the cotton wadding, cut a rectangle measuring 87cm (34in) by 20cm (8in) and two squares measuring 20cm (8in) by 20cm (8in).
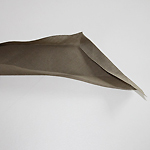
4 For the ‘gloves’, layer one plain square, one wadding square and one patterned square, with the wadding in the middle and the pattern on top. Match edges and pin the three layers together in the middle.
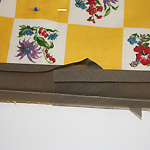
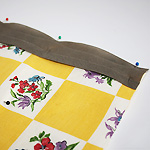 5 Cut a 20cm (8in) length of binding, open out pressed seam allowance and pin to one edge of the layered square, patterned side up.
 Machine sew along the crease of the binding’s seam allowance through all four layers (binding, patterned fabric, wadding and plain fabric). Fold binding over to plain side and slip stitch in place.
6 Repeat steps 4 and 5 with the remaining squares of fabric and wadding.
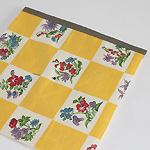
7 Layer one plain rectangle, one wadding rectangle and one patterned rectangle, with the wadding in the middle and the pattern on top. Match edges and pin in the middle.
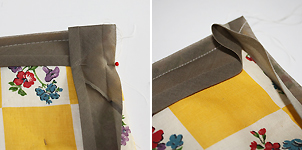
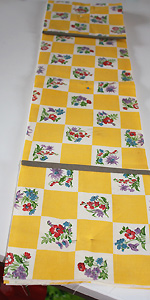 8 With the bound edge to the right, place a square glove at the left end of the rectangle and pin in place. Repeat on the right hand side, with the bound edge to the left.
 9 Cut one end of the remaining binding at a slant, turn over 5mm (¼ in) and press.
10 Opening out seam allowance, pin binding to middle edge of the rectangle, leaving the slanted end dangling by about 8cm (3in). Machine sew all layers together, including gloves, along the crease of the binding’s seam allowance.
11 When you get to a corner, stop sewing 5mm (¼ in) from the end and, ensuring needle is down, turn fabric and sew at a right angle off the top edge. Cut threads.
 12 Fold loose tail of binding back on itself to make a backwards ‘L’ shape with the seam you’ve just sewn. Then fold the tail down to line up with the edge you’re about to sew and pin in place, encasing a triangle of binding that will form a mitre. Start sewing 5mm (¼ in) down from top edge. Repeat at the next corner.
 13 When you get near to where you started, overlap the two ends, placing about 5cm (2in) of binding inside the 8cm (3in) you left hanging at the beginning. Continue sewing until seams meet.
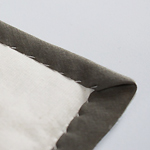 14 Fold binding over to plain side, creating diagonal mitres at each corner, and slip stitch in place.
You might also like...
More craft ideas to brighten up your kitchen


Post your comment
Join us here...


Click on a magazine title to see all its
online features and news

Stain buster
Our guide to removing smudges, spots, and other spills.
See more stain busting solutions >
Community
Forums
View all forums
Blogs
View all blogs-
 The five best things I tried this month
Posted by 11280Adrienne Wyper
-
 Learning Italian - è fantastico!
Posted by 11320Carol Muskoron
MORE FROM ALLABOUTYOU
View by magazine :
Contact | About Us | Privacy | Complaints | Terms & Conditions | Cookie Policy | Advertising | Site Map| Popular Forum Threads
© Hearst Magazines UK is the trading name of The National Magazine Company Ltd, 72 Broadwick Street, London, W1F 9EP. Registered in England 112955. All rights reserved.
All About You, Part of the Hearst UK fashion and beauty network © Copyright 2024