

Sew matchbox mice: free sewing pattern
Tuck inside a fabric-covered matchbox for a charming gift, designed by Sania Pell

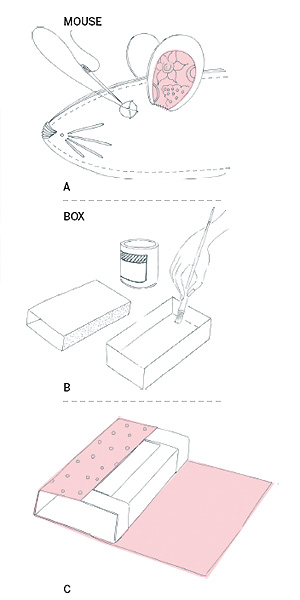
1 Using the mouse template, cut out two mouse pieces and two ears from white, grey, or black felt, and cut out two inner ears from a fine cotton printed fabric. Pin the two mouse pieces together, sandwiching 1.5cm of ribbon or leather string between the layers as a tail.
2 Machine stitch a 3mm seam around the edge, using matching thread and leaving a 2cm opening at the centre of the bottom edge. Stuff the mouse with wadding and stitch the opening closed.
3 Place a printed inner ear on top of one felt ear and hand-sew just the bottom edges securely to one side of the top of the head (so the ears can move). Repeat to attach the other ear and inner ear to the other side of the head.
4 With an embroidery needle and pink thread, embroider a small nose in satin stitch. In black thread (for white or grey felt) or pink thread (for black felt), sew four long stitches in a fan shape on each side of the nose as whiskers; the knot will show, so it can be part of the effect. Sew on two black sequins for the eyes using matching thread (A).
5 Using a small flat brush, paint a large matchbox case inside and out with white emulsion and then leave to dry (B).
6 Measure the box and cut out a rectangle of printed cotton fabric that is as wide as the length of the matchbox case, and as long as the circumference plus 1.5cm for an overlap. Stick double-sided tape around both ends of the case and two strips side by side along the middle of the underside.
7 Remove the backing from the tape and start sticking the fabric to the case at the middle of the underside, covering one of the strips of tape running down the centre. Wrap the fabric around the case, with the edges aligned (C). When you get back to the beginning, stick the end of the fabric to the other strip of tape, trimming off any excess.
8 On a second, complementary printed cotton fabric, draw around the inner box using tailor’s chalk. Cut out the rectangle and stick it to the base of the inner box on the inside using double-sided tape. Slide the inner box into the outer case and put the mouse inside.
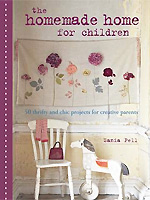
This project is taken from 'The Homemade Home for Children' by Sania Pell (Cico Books, £16.99).
You might also like...
See all of our free patterns for toys to knit, sew and crochet
More easy craft ideas for children's rooms


