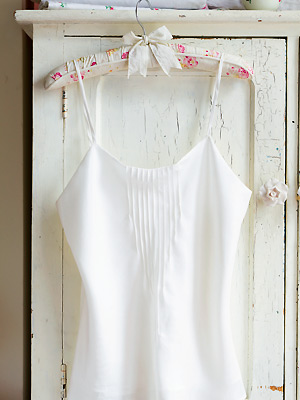
Sew a pretty pin-tucked camisole: free sewing pattern
Take a little time to sew this flattering bias-cut camisole. Here's how...

Pintucks are not difficult, but making sure they are centred and working out the extra fabric you need to allow for them can be tricky. Solution: stitch the pintucks before cutting out the front. This lined silk camisole is bias-cut to flow flatteringly over the contours. Depending on the fabric you choose, the camisole doesn’t have to be lined.
Fit
To fit size small, bust 86cm (34in). For other sizes, adjust the pattern by enlarging or taking in down the centre front and centre back. To do this, divide the difference between 86cm (34in) and your bust measurement by four. Fold the pattern pieces in half lengthways and increase or decrease the pattern at both the centre front and the centre back fold by this amount.
Materials
• 2m (21⁄4yd) fine silk 115cm (45in) wide
• Thread
Cutting out
Make up the pattern pieces on page 2 according to the instructions. (You'll need to enlarge the templates by 400%.)
Cut one main back piece and one each of the front and back lining pieces (which are slightly shorter)
Cut two shoulder straps, 43 x 4cm (17 x 11⁄2in)
1. The pintucks need to be worked before you cut out the top-layer front piece. So pin the pattern piece on the bias on the remaining fabric and cut a generous square around it, ensuring that there is a minimum of 10cm (4in) of fabric on either side of the pattern piece.
2. Fold and press the fabric in half lengthways. Using tailor’s chalk and a ruler, draw a line 37cm (141⁄2in) down this fold. This is the position of the central pin tuck. Draw the rest of the pintucks in decreasing lengths of 35cm (133⁄4in), 27cm (103⁄4in), 22cm (83⁄4in), 18cm (7in) and 15cm (6in) on either side, spacing them 12mm (1⁄2in) apart.
3. Starting with the central pintuck, fold the fabric along the marked line and place a pin at the end position of the pintuck. Stitch as close as you can to the fold and leave long threads at the end. Refold the fabric at the position of the second pintuck and repeat the process. Stitch all the pintucks in the same way. Thread each of the threads at the bottom of the pintucks onto a needle and pass them through to the back of the fabric. Tie each pair of threads together securely and then trim the ends.
4. Press the finished pintucks ao that those on the left of the central pin tuck are pressed to the left and those on the right are pressed to the right.
5. Now lay the pattern piece onto the pintucked fabric, aligning the centre front of the pattern with the central pintuck. Cut out the front of the camisole.
6. With wrong sides together, pin the front top layer of the camisole to the back top layer at the side seams. Stitch, using a 12mm (1/2in) seam. Rea[peat with the shorter lining pieces. Press the seams open and trim. With rights sides together, re-pin the seams and stitch, taking as small a seam as possible. Repeat with the lining.
7. Fold the shoulder straps in half lengthways with rights sides together. Stitch along the long edge with a 12mm (1/2in) seam. Trim close to the seam. Use a loop turner or small safety pin to turn the straps right side out. With raw edges meeting, pin one end of teh shoulder straps to the right side of the front, as marked on the pattern. Tack in position. Turn the lining inside out. Place the main camisole inside this so right sides are together and the top raw edges are aligned. Pin then stitch around the top edge. Trim the seams, clip the curves and press the seams open. Turn the camisole right side out.
8. At the bottom edge of the lining, turn up and press a 12mm (1/2in) double hem. Repeat with the top layer.
9. Try on the camisole. Pin the shoulder straps in the correct position on the inside of the back top edge, ensuring the fit is correct. Take the camisole off. Turn in the ends of the shoulder straps and slipstitch neatly in position, stitching just through the lining.
 This pattern is taken from 'Sewing Made Simple' by Tessa Evelegh (Jacqui Small, £25). Click here to buy
You might also like...
Sew the simplest-ever skirt - from the same book
Trim a camisole with lace
Sew a jersey tunic top
Post your comment
Join us here...
Community
Forums
View all forums
Blogs
View all blogs-
 The five best things I tried this month
Posted by 11280Adrienne Wyper
-
 Learning Italian - è fantastico!
Posted by 11320Carol Muskoron


