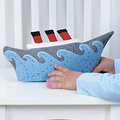
Sew an ocean liner
Sew and embroider an impressive shipshape soft toy
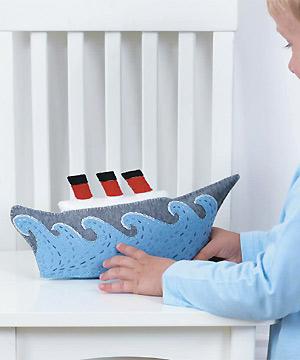
Watch your child sail off and explore unknown territories under the dining table with this majestic liner. The basic shapes are simple, while the embroidery can be as detailed as you wish.
Materials
● Paper for templates
● Two 30 x 8 cm (12 x 3 in) pieces of grey felt
● Two 30 x 8 cm (12 x 3 in) and one 20 x 4 cm (8 x 11⁄2 in) pieces of pale-blue felt
● Stranded embroidery threads in white, five shades of blue, grey and black
● Two 14 x 2.5 cm (51⁄2 x 1 in) pieces of white felt
● Scraps of red and black felt
● Red, black and white sewing threads
● Toy stuffing
Equipment
● Ocean liner templates - click here to download the ocean liner templates
● Paper scissors
● Fading fabric marker
● Fabric scissors
● Iron
● Fusible webbing
● Pencil
● Embroidery needle
● Hand-sewing needle
1 Photocopy the templates at 250 per cent onto a piece of paper and cut them out. Using the fabric marker, draw around the outer edge of both hull templates onto the grey felt and cut out the shapes.
2 Cut the waves out of the templates. Iron fusible webbing onto the two larger pieces of pale-blue felt. Using the pencil, draw around the waves onto the paper backing of the webbing and cut out the shapes. Peel off the paper backings and, following the templates, iron the waves into position on the hulls, making sure you have a left and a right-hand hull.
3 Using the embroidery needle and three strands of thread throughout, embroider the waves and anchor. Embroider short lines of white chain stitch along the crests of the waves. Using one shade of blue, embroider blanket stitch in the troughs of the waves, between the lines of chain stitch. Make the legs of the stitches uneven in length. Using the remaining shades of blue thread and white, work lines of running stitch that echo the curls of the waves. Make the stitches different lengths. Embroider the anchor in grey chain stitch and the flukes in black backstitch. Using black thread and stab stitches, embroider a star within the circle at the top of the anchor, then whip the chain stitch with black. Whip the black flukes with grey thread.
4 Draw around the superstructure template onto both pieces of white felt. Iron fusible webbing onto the scraps of red and black felt. Cut the funnels out of the template and draw around the large section onto the red felt and the smaller tops onto the black felt. Cut out the shapes, peel off the backings and iron the pieces onto the white superstructures, making sure you flip one of them to create left- and right-hand pieces.
5 Using the hand-sewing needle and matching sewing threads, work lines of tiny running stitch across the top and bottom of the red sections and across the bottom of the black section.
6 Lay the right side of a superstructure piece against the wrong side of a hull piece, positioning it between the placement marks on the template and with 1 cm (1⁄2 in) of superstructure behind the hull. Using the embroidery needle, three strands of grey thread and blanket stitch, sew the two pieces together; make the legs of the blanket stitch of even lengths. Repeat to join the other superstructure piece to the other hull piece.
7 Wrong sides facing, place the two boat pieces together. Using the embroidery needle, three strands of grey thread and blanket stitch, sew the two hull pieces together. Start at the bottom of the bow and sew around to the superstructure then secure the thread. Start again at the bottom of the stern and sew around to the superstructure. Using the handsewing needle, sewing threads and blanket stitch, sew the two superstructure pieces together, changing thread colours as appropriate.
8 Draw around the base template onto the remaining piece of pale-blue felt and cut out the shape. Using the embroidery needle, three strands of the first shade of blue thread and uneven blanket stitch, sew the base to one side of the hull. Start at one end and fit the curved edge of the base against the straight edge of the hull.
9 Stuff the liner with toy stuffing through the open edge of the hull. Stuff the funnels firmly and the rest lightly. Sew the other side of the
base to the other side of the hull.
 This pattern is taken from 'Stitched Toys' by Kate Haxell (Hamlyn, £14.99).
You might also like...
Post your comment
Join us here...
Community
Forums
View all forums
Blogs
View all blogs-
 The five best things I tried this month
Posted by 11280Adrienne Wyper
-
 Learning Italian - è fantastico!
Posted by 11320Carol Muskoron


