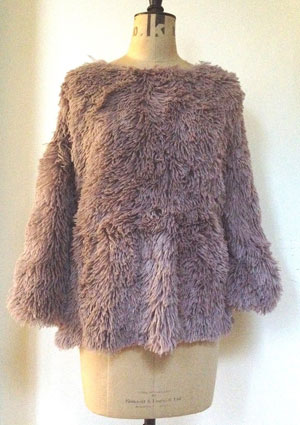
Make a fluffy jumper: free sewing pattern
Cuddle up to this plush sweater with our easy sewing tutorial. By Suzanna Drew-Edwards

You will need
• A broadsheet newspaper for making the pattern
• 1.5 metres of plush fabric or a fake fur (we used a plush fur throw and cut it up)
• Sellotape, a ruler, tape measure and a marker pen
• A man’s T-shirt – we used a medium to large size to use as a basic pattern template
Making the front/back pattern
This back / front pattern piece is for cutting out on the fold of the fabric.
When you’re ready to cut out, fold the fabric and lay the straight edge of the pattern piece along the fold.
Sellotape two sheets of newspaper together so you have one long piece.
Fold your T-shirt in half lengthways.
Lay the folded T-shirt on top of the piece of newspaper with the folded edge of the T-shirt lined up to one long edge of the newspaper.

With your marker pen, draw round the T-shirt outline (image 1).
Fold the T-shirt sleeve in so that it forms a straight line to run parallel with the T-shirt side seam. Mark this outline on your newspaper pattern (image 2).
Now widen the neck ever so slightly – you don’t want the neck of your jumper to be as tight as a T-shirt neck (image 3).
The front neckline should be lower than the back.
We marked the front neckline on the same pattern piece (we only used one template for the front and the back – the front neckline has the dotted line in the pictures (image 4)).
Add 1.5cm seam allowances and cut out your back/front pattern piece (image 5).
Making the sleeve pattern
This sleeve pattern piece is for cutting out on the fold of the fabric.
You need three measurements.
1. The length you want your sleeves to be - it doesn’t matter if you make them too long, you can trim them later.
2. The width of the sleeve seam on your back/front pattern template.
3. The width of your cuff measurement (again, if you make your sleeves too wide, you can alter them when you are stitching the jumper together).
Draw these measurements onto a piece of newspaper (image 6).
Cutting out
Now your pattern’s made, cut out the back, front and sleeves in fabric, making sure to lay the pattern pieces on the fold of the fabric.
Start stitching...
The shoulder seams
Place the back and front with right sides together and match the raw edges of the shoulder seams. Pin them into place and stitch with a zigzag 1cm from the edges (image 7).
The sleeve seams
Sleeves: open out your top and place it with right side facing upwards on a flat surface. Fold your sleeve in two and mark the centre point with a pin.
With right sides together, place a sleeve piece on the shoulder seam, matching the stitched shoulder seam and the centre of your sleeve piece (image 8).
Stitch with zigzag. Repeat with the other sleeve.
The back and front
Sleeve and side seams: with right sides together, lay the tunic out on a flat surface. Match up the armhole seams at the armpit and pin from the sleeve cuff all the way down each side seam, finishing at the base of the tunic. Stitch with zigzag 1cm from the edge (image 9).
Try it on for size. You may want to make the sleeves slimmer or give a bit more shape to the main garment. If so – this is the time to do it.
Finishing
Using a zigzag stitch, sew around the neck edge. Turn under by 1cm and machine or handstitch into place.
Repeat with the cuffs and bottom edge.
You might also like...
Turn an old sweater into something gorgeous
See all of our free knitting patterns for jumpers
Beat the chill with these winter warmers


