Make a leather journal: free sewing pattern
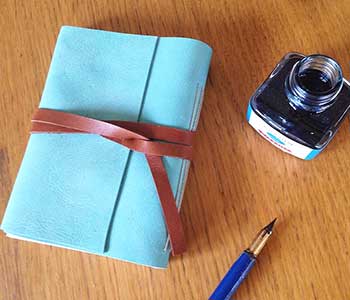
Keep track of thoughts, jottings and plans in style with this classic leather journal. By Suzanna Drew-Edwards

You will need...
● Four A3 sheets of paper. We used cartridge paper, but you could use normal thickness paper (you'd probably want to have more pages)
● 30cm x 13.5cm rectangle of leather, pleather or thick felt
● 50cm length of leather lacing for keeping the journal closed – or a strip of leather. You could also use thick ribbon
● Strong thread (we used embroidery floss)
● Needle
● Ruler, craft knife and cutting board
● Awl for making holes in the leather (or another sharp-pointed tool)
 Cutting the paper
Image 1: Using your ruler and scalpel measure and cut 15 rectangles of paper measuring 19cm x 13cm.
Fold each of these rectangles in half along the longest edge (so the short edges are together).
Group them into ‘signatures’ – these are the clusters of paper which form the pages in the book.
We had five signatures with three rectangles of paper (six pages) in each one.
Punching holes in the signatures
Image 2: Open out each signature.
Using your ruler and a pencil, make three marks – one 1cm from the top, one in the middle (6.5cm from the top) and one 1cm from the bottom.
Use the awl to make three holes where the marks are.
Repeat with all the signatures.
Punching holes in the leather
Image 3: Now you need to make a vertical row of three holes for each of your signatures. We had five signatures, so needed three rows of five holes.
Image 4: First of all, lay your signatures on top of each other to see how deep the spine of your journal will be. Ours was about 1.25cm.
To find out where to put the holes in the leather, lay one of the signatures on the left-hand side of your rectangle of leather, aligning the edges of signatures and the leather.
Using this signature as the template, make three marks on the leather where each hole lies. Use your awl to make holes in the leather.
Now, make another similar set of marks and holes a few millimetres along.
Repeat until you have made three holes for each of your signatures.
Start stitching
This sounds complicated when you read it, but once you’ve done one signature, it’s easy.
Thread your needle with an arm’s length of thread.
Image 5: Open out one of your signatures and working from the inside, post your needle into the middle hole. Pull the thread through (leaving approximately a 7cm tail of thread inside the signature) and then do a stitch into the top hole – so you have a big stitch on the spine of the signature.
Image 6: Pull the needle through and post it back down into the central hole again. Then a big stitch on the outside of the spine into the bottom hole and then back through the central hole of the signature (your needle will be on the spine side of the signature at this point).
Attaching the signature to the leather
Image 7: Push your needle into the middle hole on the far right (see image 7). Then make a big stitch up to the top hole and through the leather and the signature (so now your needle is inside the signature again).
Now back down through the middle holes and into the bottom hole (another big stitch on the outside of the leather).
Finishing off the signature/leather stitching
Image 8: Pull your needle through and post it back into the central hole of the signature, but this time… make sure your needle comes out in between the signature and the leather.
Image 9 & 10: Loop it though one of your big stitches that lie along the spine of the signatures and then push it back through the middle hole of the signature so it comes out in the same place as your original 7cm long tail.
Image 11: Tie the two ends together into a secure knot and trim.
Repeat with the other four signatures until they’re all securely fastened.
Applying a line of glue
If the signatures wobble around a bit, you can apply a thin layer of glue to each of the spines so they sit more securely together.
Sewing on the leather closure
Image 12: Take your strip of leather or ribbon and stitch it onto the right-hand side of the leather.
Wrap it round your journal and tie it shut.
You might also like...
Cover stationery with fabric and wallpaper
Create a stylish home office
See all of our free sewing patterns


